EASY EVERY DAY TRIED & TESTED RECIPES FOR EVERYONE AROUND ME
Baking 101
As they say ....... Baking is a Science.
Lets learn this Science from the comfort of your home.
Mastering the art of Baking begins with a solid foundation and that's exactly what this guide provides.
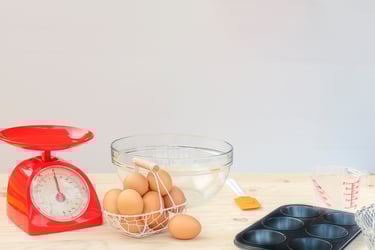
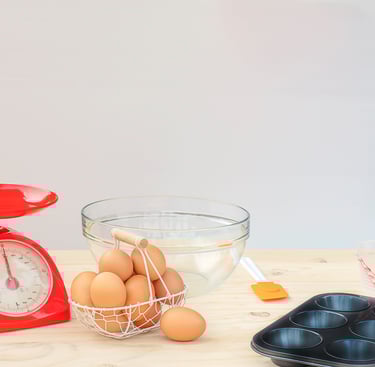
ORGANIZE your baking pantry.....
Get fresh ingredients, label all of your stuff in clear readable text.
Buy basic baking tins. To start with one 9 x 13 inch Loaf, 8 inch dia Round & 8x8 inch Square tin are enough. Buy light colored tins as the do not absorb heat and let your baked good turn out perfect.
Have baking essentials, including:
Mixing bowls, STIANLESS STEEL or GLASS ones only!!!! a BIG NO TO PLASTIC ones.
Measuring cups & Spoons.
Balloon Whisk
Silicon Spatula
Sifter
Oven Thermometer
KEEP YOUR KITCHEN NEAT, CLEAN & ORGANIZED!!!
Learn the basic BAKING TERMS because IT MATTERS
Pre-Heat: Setting out the oven temperature as mentioned in the recipe at least 15 minute prior to baking.
Creaming: Beating the fat, usually butter to aerate. Most recipes call for creaming of butter & sugar, as it helps sugar to dissolve fully or partially in addition to aerate the mixture.
Beat: Vigorously mixing the ingredients using balloon whisk or electric beater.
Fold: As the name indicates folding is technique used to mix by placing layers over one another using silicon spatula. Its done gently to mix and aerate the batter for better product.
Whisk: Mixing the ingredients using balloon whish or electric beater with whisk attachment. Basically its for incorporating air for structure and soft product.
Sift: Done with sifter. Dry ingredients are sifted to break down lumps if present and to aerate too.
Kneading: This can be done by hand or by using hook attachment of electric mixer. Its used for making dough in bread making or cohesive structured baked products.


Three P's Of Baking
Precision, Patience, Practice
Precision: Precision is everything when it comes to baking. You need to make sure that all your ingredients are measured exactly as stated in recipe. DO NOT CONVERT CUPS TO GRAMS or VICE-VERSA
Patience: This P is one of the toughest, I struggled with it most in my baking journey.
Out of temptation to eat a yummy fresh bake do not rush with the recipe.
Always Pre-heat your oven.
Never Open your oven door too frequently while baking.
Practice: I do not believe in perfection. We all are humans and make mistakes all the time. However, I strongly believe practice drastically increase your skills as well as confidence.
Get to know your OVEN because IT MATTERS
Oven is basically a machine which works on electricity or gas. Both are equally good ....... do not panic if your friend has a gas and you have the electric one. You both can create marvels just discover the following in your oven and adjust accordingly.


HOT SPOTS: Most ovens have hot spots. If your cookies on one side of the oven brown faster or your cakes rise unevenly, then your oven has hot spot on that side. You can discover the hot spot of your oven by placing slices of bread in rows on a baking sheet. Bake them, then notice the browning of toasts. Now you know hotspot of your oven, deal with it by either placing the baking tray/tin a bit away if possible or rotating it in midlle of baking.
OVEN TEMPERATURE: Ovens take a while to preheat, generally between 10-15 minutes in normal weather, like mine takes more time in winters and less in summers. Preheating the oven is actually a very important step to ensure your baked goods are fully cooked, rise properly and have the desired texture and flavor. Always preheat at the temperature mentioned in recipe.
Some ovens aren’t calibrated properly. The best way to avoid baking at wrong temperature is to use an oven thermometer.
OVEN SHELVES: Some recipes won’t mention which oven shelf to use. This can be very confusing for baking beginners. But if it’s not specified, it’s safe to assume you should bake on the middle shelf.
Air circulation is very very important for even and perfect baking. So, don’t crowd the oven!
ALWAYS KEEP YOUR OVEN NEAT AND CLEAN.
Use Oven cleaner & kitchen detergent for a sparkling shinny oven.
RECIPE
To Avoid wasting of your precious ingredients and time, read your recipe carefully from start to end. Even if you have baked thousand times READ THE RECIPE and YES reading alone is not enough, FOLLOW IT STRICTLY!!!
DONOT SKIP ANY STEP. Baking is a science and each step has a purpose to achieve that perfect product. I would highly emphasize not to substitute any ingredients in a recipe, specially in the first attempt, as it will change a lot in the product.
Use room temperature ingredients until specifically mentioned to use cold or hot ingredients.
Use the right ingredients, like if the recipe calls for granulated sugar do not use caster sugar or otherwise. Do not use powdered sugar instead of icing sugar as the later has premixed corn flour and helps to stabilize the structure of product.
Use Fresh Ingredients, Test your Leaveners, To test Baking Soda, you can try pouring a teaspoon of vinegar over a little bit of baking soda (about 1/8 teaspoon) in a cup. If it bubbles immediately, it’s good to use. If nothing happens, it has probably lost its effectiveness and should be replaced.
To test baking powder, pour about 2 tablespoons of hot water (30 g/1 oz.) over 1/2 teaspoon of baking powder. If it doesn’t bubble up, it might be time to replace it. I found it best to buy small sachets of baking powder. You’ll go through open sachets much faster when they are small so the baking powder is less likely to lose its potency.
Measure the ingredients Rightly
As you all know, Baking is a science, therefore, PRECISION is the key to a successful, Consistent and high-quality baking product.
Successful Baking is a result of successful chemical reaction. Who wants to waste alot of expensive baking raw materials.....So always measure with precision and to ensure the accuracy:
Use Digital Scales for weight measurements.
Measure Dry Ingredients in Dry Measuring Cups
Measure Liquids in Liquid Measuring Cups.
Level ingredients (e.g., flour) to avoid excess.
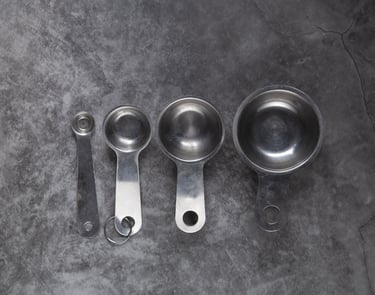
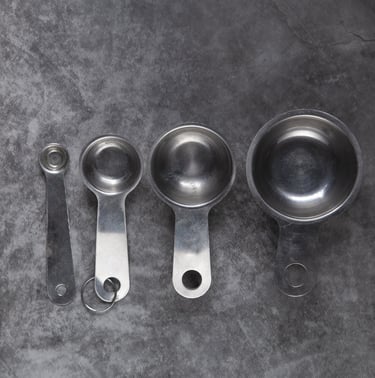
How to Measure Dry Ingredients:
Always use purpose made Volumetric Cups and Spoons for measuring Dry Ingredients. USE OF USUAL HOME CUPS AND SPOONS IS STRICTLY NOT ALLOWED.
SPOON AND LEVEL METHOD: Fill your Cup with dry ingredients (Flour, Sugar, Corn-flour etc.) using the spoon a little heaped than level it using a knife or even your finger. Do Not Pack the dry ingredients in cup except Brown Sugar, which is mostly measured packed in cup or spoon. Packing the dry ingredients in measuring cup can end up in more quantity so it is not at all recommended

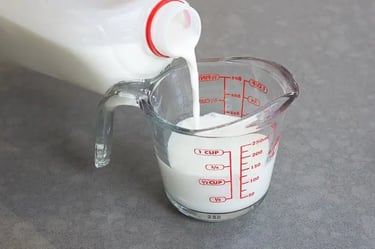
How to Measure Liquid Ingredients:
Always use purpose made Volumetric Jug or Cups for measuring Liquid Ingredients. Place the Jug or cup on flat surface and do not hold in your hand as it will alter the measurement.
While reading the measurement, bend down to eye level with measuring jug.

How to Prepare your Ingredients before Baking???
For most of the baking recipes you have to start with the room temperature ingredients. Room Temperature is the temperature of any room without air-conditioning or heating system On. So place all your recipe ingredients an hour or so before starting the process, in that room, this surely is not your kitchen as kitchen is often not heated. I keep in my dinning room. You must be wondering Why Room Temperature??? The answer is ; using very cold ingredients results in low temperature cake batter which will take longer time than specified to bake. Using melted butter instead of room temperature e.g. will result in very very soft and prone to breaking cake.
BUT
IF THE RECIPE DIRECTS TO USE CHILLED OR COLD INGREDIENTS, USE THE SAME
How to test your LEAVENERS???
Baking powder and Baking Soda are Leavening agents, used to help baked goods rise. But they can easily lose their effectiveness if not stored properly. It’s best to test them once in a while, or when in doubt.
To test Baking Soda, you can try pouring a teaspoon of vinegar over a little bit of baking soda (about 1/8 teaspoon) in a cup. If it bubbles immediately, it’s good to use. If nothing happens, it has probably lost its effectiveness and should be replaced.
To test Baking Powder, pour about 2 tablespoons of hot water (30 g/1 oz.) over 1/2 teaspoon of baking powder. If it doesn’t bubble up, it might be time to replace it.
Once you open a box or bottle of leaveners, keep its lid tightly closed so that moisture does not effect the left over leavener.